

Story Time Missed
Someone stayed up too late last night and woke up too early this morning.
 When I looked up after cleaning the morning mess and doing some laundry, I saw the picture above, she was waiting for me to come read her a story. I wish I'd stopped working long enough for her to drift off to sleep with her story.

Cowboy Vest Tutorial
Howdy Pardner! The discovery of some long lost toys after cleaning the basement, has spurred a new interest for my son. Cowboys! We have borrowed books from the library about the rodeo, watched clips from old westerns with Daddy, learned about how cowboy hats are made, and then, we just had to have a cowboy costume of our very own.
 Now we share our fairly simple vest with you here.
You'll need,
 If your pants haven't been used for another project already, like mine, you should be able to use a side seam as the seam in the middle back of the vest. Use the t-shirt as a guide for the vest. Pay particular attention to the neck line and arm holes. I traced the arm holes at the seam where the sleeves are attached with a pencil first, making dots as I lifted the sleeve, then cut along the dotted line.
 You need to do this for the front and back, folding the shirt one way then the other to trace it, since the neckline for the front and back are different.
 Now, sew the two back pieces together, if you weren't able to use the side seam of your pants. Then you sew the side seams of the vest from the armholes, down. Your vest is basically done here, you can try it on and make any adjustments.
 To make fringes make a small zigzag around the armhole where you want the fringes to stop then snip snip snip. You can make more fringes in the same way on the bottom and around the front and neck of the vest if you want. Or attach ribbon that is fringed like this.
 The front may require some shaping since we traced it from a t-shirt meant to be closed all the way to the neck. Just trim away a nice curve from the front middle to the shoulders to make it lay flat. I had my son put the vest on then just cut away along the line that the fabric folded at. (Um, it's probably safer to mark the line then take off the vest to cut it, I don't want to be responsible for any boo boo's.)
 My son wanted all fringes removed so I cut them off the arms and rolled all raw edges under then I used a decorative stitch to hem them.
 And there you have it, the 6 Berries Cowboy/Cowgirl Vest (because of course little sissy will be needing one soon, maybe pink, definitely fringed.)
 A quick update: My son has since moved on to dinosaurs, as I mentioned before. Wouldn't you know it, I actually invest a little time into a costume and today, I have to beg him to try it on for one last photo shoot. The mustache was all it took to convince him though. I made it out of felt and a piece of soft elastic last year and it just goes so well with this cowboy outfit. Don't you think?

You'll need,
- An old pair of pants you don't want any more.(or any other cowboy vest like fabric)
- A t-shirt, tank top or vest, that fits the vest wearer well, to trace.
- Matching thread.
- Tracing pen or pencil.
- Fabric Scissors.


A Wallet
I found that little pirate something I was looking for.
 Remember the Toddler Purse? Well I thought that I would attempt to make a wallet version for my son.
 I still have lots of pirate fabric laying around so I figured I'd use some of that.
 The end result is okay, but I'm not completely satisfied. Still, the fabrics look pretty cute together and I like the black zipper, button and buckle. And how about the X marks the spot lace up.
 I need to tweak the pattern a bit, the way it folded up didn't work quite how I'd imagined it and it's a little bulky.


My son, however, has no complaints about this one (other than it took far longer to finish than he would have liked).

But, all those pockets are just perfect for hiding his oh so important tiny treasures.
Dinosaurs Have Taken Over the Garden

I'm Open for Business
Well I did it. My first items up for sale. The shop is officially open!
 Just a few bunnies to start with, but more to come. I will have some "boy" looking ones, but a certain nephew has asked the Easter Bunny to purchase one for his Easter basket this year and I need to see which one he wants before I post them for sale.
 Stop by and see if you might want to give one of these critters a good home. I think my nephew's got the right idea, they would make great Easter gifts don't you think.
 My kids will be very sad to see them go, but know that some other little kid will love them as much as they do, and that makes them feel better.
 It seems to be tough for them to let a hand made by mommy item leave the house, even if it's a gift for one of their friends or cousins.
 It feel good to know my kids enjoy the things I make, I just have to be sure they get some hand-mades of their own.
 Just a few bunnies to start with, but more to come. I will have some "boy" looking ones, but a certain nephew has asked the Easter Bunny to purchase one for his Easter basket this year and I need to see which one he wants before I post them for sale.
 Stop by and see if you might want to give one of these critters a good home. I think my nephew's got the right idea, they would make great Easter gifts don't you think.
 My kids will be very sad to see them go, but know that some other little kid will love them as much as they do, and that makes them feel better.
 It seems to be tough for them to let a hand made by mommy item leave the house, even if it's a gift for one of their friends or cousins.
 It feel good to know my kids enjoy the things I make, I just have to be sure they get some hand-mades of their own.
Making the Most of Michigan Winter
By spending some time finding inspiration in the creativity of others. .
 . . . Having some one on one time with my son and the snow! (See the shadows! The sun has, thankfully, been a frequent visitor this winter.). . .
 . . .Making a wine bag for the wine and cheese basket my daughter's class is putting together for the annual school fundraiser (It's reversible). . .


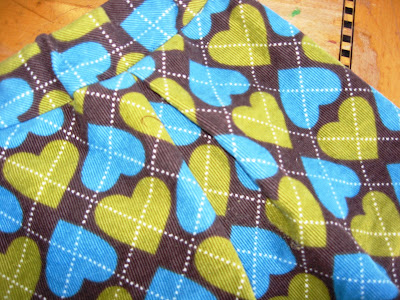
. . .Finding some unexpected alone time with my baby girl and finishing a cute little skirt she's been waiting for. . .
 . . . And finally preparing for the grand opening of my little etsy shop!
 It may not end up being very grand, but at least it will be open.
 . . . Having some one on one time with my son and the snow! (See the shadows! The sun has, thankfully, been a frequent visitor this winter.). . .
 . . .Making a wine bag for the wine and cheese basket my daughter's class is putting together for the annual school fundraiser (It's reversible). . .

. . .Finding some unexpected alone time with my baby girl and finishing a cute little skirt she's been waiting for. . .
 . . . And finally preparing for the grand opening of my little etsy shop!
 It may not end up being very grand, but at least it will be open.
Ahoy, Me Hearties!
Have you seen this yet?
Dana Made It and Made by Rae are celebrating the boy this month and boy are there some great projects over there. I'm loving it! This bowtie may be making an appearance this summer at some weddings we will be attending. And oh the pirate love!
 Well, in celebration of the month of the boy we have our own boy project in the works here. Pirates are pretty big around these parts right now. Pirate costumes, Pirate books, pirate quilts in the making (sneak peek above, more to come soon), pirate speak, "Belay that swab and get ye to ye room! It needs to be cleaned," and of course pirate treasure maps!
 To make ours we opted to print this free coloring page map instead of drawing our own, like mommy wanted. My boy decided it just wasn't authentic looking enough so he wanted to age it a bit. I've done this using coffee before, but as we don't drink coffee in our house, and the only tea we have at the moment is green tea, we decided to give balsamic vinegar a try (his idea). Rip the edges before staining to create the illusion of burnt edges, or you could actually burn the edges if you're feeling daring.
 I would not recommend the vinegar if you don't have to. Coffee would work much better, but after a few days, yes days, of drying, the stickiness disappeared and the map was ready for some crickling. Now it looks like a real authentic pirate map don't you think?
 All we need now, is some hidden treasure!
Dana Made It and Made by Rae are celebrating the boy this month and boy are there some great projects over there. I'm loving it! This bowtie may be making an appearance this summer at some weddings we will be attending. And oh the pirate love!
 Well, in celebration of the month of the boy we have our own boy project in the works here. Pirates are pretty big around these parts right now. Pirate costumes, Pirate books, pirate quilts in the making (sneak peek above, more to come soon), pirate speak, "Belay that swab and get ye to ye room! It needs to be cleaned," and of course pirate treasure maps!
 To make ours we opted to print this free coloring page map instead of drawing our own, like mommy wanted. My boy decided it just wasn't authentic looking enough so he wanted to age it a bit. I've done this using coffee before, but as we don't drink coffee in our house, and the only tea we have at the moment is green tea, we decided to give balsamic vinegar a try (his idea). Rip the edges before staining to create the illusion of burnt edges, or you could actually burn the edges if you're feeling daring.
 I would not recommend the vinegar if you don't have to. Coffee would work much better, but after a few days, yes days, of drying, the stickiness disappeared and the map was ready for some crickling. Now it looks like a real authentic pirate map don't you think?
 All we need now, is some hidden treasure!
Subscribe to:
Posts (Atom)